Elasticsearch, Logstash and Kibana on Docker
While doing performance testing on a project I needed to process the access logs of our web servers to define the navigation profile of our current users.
So I though it would be a nice time to play with Elasticsearch, Logstash and Kibana as I’ve heard of the stack.
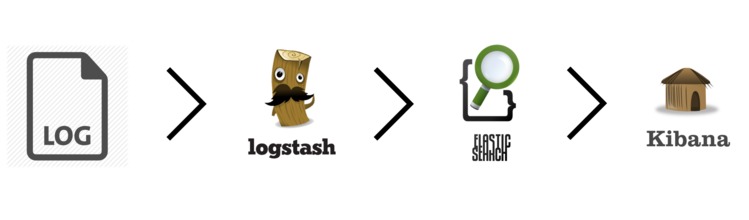
ELK Stack
The first thing to notice when using it is how easy to use is. It took me a couple of hours since I decided to use it to have a prototype working on my local host. So let’s see each one of them.
Elasticsearch
Elasticsearch is a search server based on Lucene. Is Open Source and can be found on the Github Elasticsearch project
In order to set up Elastic Search the only thing that you need to do is, download the package and execute it:
➜  wget https://download.elasticsearch.org/elasticsearch/elasticsearch/elasticsearch-1.4.2.tar.gz
➜  tar -zxvf elasticsearch-1.4.2.tar.gz
➜  cd elasticsearch-1.4.2
➜  ./bin/elasticsearch
[2015-02-11 10:43:21,573][INFO ][node                     ] [Jumbo Carnation] version[1.4.2], pid[6019], build[927caff/2014-12-16T14:11:12Z]
[2015-02-11 10:43:21,574][INFO ][node                     ] [Jumbo Carnation] initializing ...
[2015-02-11 10:43:21,578][INFO ][plugins                  ] [Jumbo Carnation] loaded [], sites []
[2015-02-11 10:43:23,483][INFO ][node                     ] [Jumbo Carnation] initialized
[2015-02-11 10:43:23,483][INFO ][node                     ] [Jumbo Carnation] starting ...
[2015-02-11 10:43:23,528][INFO ][transport                ] [Jumbo Carnation] bound_address {inet[/0:0:0:0:0:0:0:0:9300]}, publish_address {inet[/10.105.14.17:9300]}
[2015-02-11 10:43:23,540][INFO ][discovery                ] [Jumbo Carnation] elasticsearch/_EGLpT09SfCaIbfW4KCSqg
[2015-02-11 10:43:27,315][INFO ][cluster.service          ] [Jumbo Carnation] new_master [Jumbo Carnation][_EGLpT09SfCaIbfW4KCSqg][pumuki][inet[/10.105.14.17:9300]], reason: zen-disco-join (elected_as_master)
[2015-02-11 10:43:27,332][INFO ][http                     ] [Jumbo Carnation] bound_address {inet[/0:0:0:0:0:0:0:0:9200]}, publish_address {inet[/10.105.14.17:9200]}
[2015-02-11 10:43:27,332][INFO ][node                     ] [Jumbo Carnation] started
[2015-02-11 10:43:27,783][INFO ][gateway                  ] [Jumbo Carnation] recovered [4] indices into cluster_state
This will set elasticsearch web server listening on port 9200 on your localhost.
At this moment you should be able to retrieve the following information:
➜  curl -XGET http://localhost:9200/
{
  "status" : 200,
  "name" : "Jumbo Carnation",
  "cluster_name" : "elasticsearch",
  "version" : {
    "number" : "1.4.2",
    "build_hash" : "927caff6f05403e936c20bf4529f144f0c89fd8c",
    "build_timestamp" : "2014-12-16T14:11:12Z",
    "build_snapshot" : false,
    "lucene_version" : "4.10.2"
  },
  "tagline" : "You Know, for Search"
}
You can also get the stats by doing:
➜  curl -XGET http://localhost:9200/_stats
{"_shards":{"total":0,"successful":0,"failed":0},"_all":{"primaries":{},"total":{}},"indices":{}}
When I was playing I processed several times different logs. So in order to clean all the information of my elasticsearch instance I found quite useful the following command that will remove all your existing data. So BE CAREFULL:
➜  curl -XDELETE "http://localhost:9200/*"
{"acknowledged":true}
Logstash
Logstash is a tool to manage events and logs. Basically you use it to collect, parse and store logs. When used with elasticsearch you can send the processed logs structured to elasticsearch to be queried. It’s also Open Source, it’s part of the elasticsearch family and you can find the source code on the Github project repo.
In order to setup Logstash you will need to Download the package:
➜  wget https://download.elasticsearch.org/logstash/logstash/logstash-1.4.2.tar.gz
➜  tar -zxvf logstashh-1.4.2.tar.gz
➜  cd logstash-1.4.2
To process your Access logs and send them to Elasticsearch you will need to create the logstash configuration file. My configuration file is similar to the following one:
➜  cat logstash_simple.conf
input {
  file {
    path => "/var/log/access/*.log"
    type => "apache_access"
  }
}

filter {
  if [path] =~ "access" {
    mutate { replace => { "type" => "apache_access" } }
    grok {
      match => { "message" => "%{COMBINEDAPACHELOG}" }
    }
  }
  date {
    match => [ "timestamp" , "dd/MMM/yyyy:HH:mm:ss Z" ]
  }
}


output {
  elasticsearch_http {
    host => localhost
  }
  stdout {
  }
}
➜
In the input section we define which logs logstash needs to process. You can define different types of input but we are basically just getting them from files. To see other types of input take a look at the documentation.
The filter is how logstash will process your logs. We are using grok which is like a regex parser for unstructured data. We just use the %{COMBINEDAPACHELOG} regex and set the date format.
For the output we have created two outputs. Our Elasticsearch instance and standard output, basically to see what is going on.
In order to run logstash:
➜ bin/logstash -f logstash_simple.conf
Kibana
Kibana is a visualization tool for data on top of elasticsearch. The Github project.
In order to set it up just download it and run it:
➜  wget https://download.elasticsearch.org/kibana/kibana/kibana-4.0.0-beta3.tar.gz
➜  tar -zxvf kibana-4.0.0-beta3.tar.gz
➜  cd kibana-4.0.0-beta3
➜  bin/kibana
The Kibana Backend is starting up... be patient
{"@timestamp":"2015-02-11T12:34:29+00:00","level":"INFO","name":"Kibana","message":"Kibana server started on tcp://0.0.0.0:5601 in production mode."}
And kibana should be running on your localhost at port 5601.
The first page will ask you to create an index. If you don’t have any data yet you will not be able to create it. Once you have created the index you can start playing querying the data.
Deploy
Once the Stack was locally working I thought it would be good to deploy it to one of our boxes and send periodically our access logs to be able to have the logs updated every once in a while.
And I thought that maybe creating a Docker container to be able to replicate it easily on the future may be a good possibility.
![]()
First Approach - One to rule them all
My first approach was to create a single container with the three services running on top of it. I know that’s not how you are supposed to use Docker but I wanted to try first.
So my idea was to have it everything running with supervisor on the docker container and add a data volume to the container with the logs where logstash will pick the files.
The code is available on this Github repo.
Create the image
As it is my first post about Docker I will explain a little bit how to create the image and build it. The image created was from a basic ubuntu one and basically you need to create a file called Dockerfile with the information in the link.
In order to build the container you just need to run:
➜ docker build -t elk:latest .
This will create a local image that can be executed. You can list your images doing:
➜  docker images
REPOSITORY                         TAG                 IMAGE ID            CREATED             VIRTUAL SIZE
elk                                latest              28bf7af29dc1        55 seconds ago      575.7 MB
Running the image
Once the image is built you can run it just by doing:
➜ docker run -d -p 5000:5601 --name elk -v /path/access-logs:/var/log/access elk
This will link your local port 5000 with the port 5601 on the container (which is the kibana one) and will add you local /path/access-logs to the container. Is at this path where you are supposed to be logging your access logs.
TODO Images, separate containers, push the image to docker hub